Seek Joy: Spring Garland Craft
- The Crafty Raven

- Apr 21, 2025
- 2 min read
Here in the Great White North, it is still winter. However, there are hints that the weather is turning toward spring, although spring has not truly arrived. This craft is designed to bring a bit of spring into your home and brighten your winter blues. It is also a good stash buster for those odds and ends that can clutter our craft drawers.
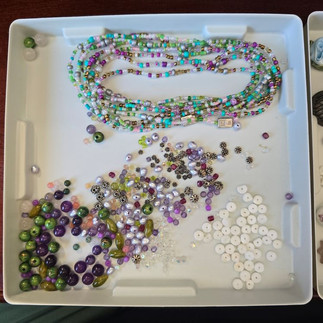
For a DIY Spring Garland, you can use felt flowers, pompoms, and paper cranes, or do what I did and dump a bunch of spring-colored brickabrack onto your desk.


I chose a variety of buttons, beads, and costume jewelry. And, as you'll see in later pictures, I incorporated craft objects like thread spools, bobbins, and safety pins.
Materials:
Felt or fabric sheets in various spring colors (pastels, bright tones)
Yarn in multiple spring colors
Colorful origami paper (or any type of decorative paper)
Scissors
a pom-pom maker (an actual one or a makeshift one such as a fork)
Needle and thread
Embellishments like buttons, beads, or costume jewelry
Twine, thread, yarn, or ribbon for stringing
If making felt or fabric flowers:
Start by cutting flower shapes from the felt or fabric. You can make simple petals or go for a layered look by cutting multiple petals for a flower.
Stack the felt or fabric flower petals and sew them with a needle and thread at the center.
You can sew a button or bead at the center of each flower for extra flair.
Use a needle and thread to attach each flower to the twine or ribbon, leaving some space between them.
If making pom-poms:
If you're using a pom-pom maker, follow the instructions to create pom-poms in varying sizes. Alternatively, wrap yarn around your fingers, fork, or a cardboard piece and tie in the center to make your pom-poms.
Trim the pom-poms to even them out after making them, giving them that fluffy, rounded look.
Tie each pom-pom onto your string or twine, spacing them out evenly.
If making paper cranes or other origami:
Follow a simple origami tutorial like this one to make your paper cranes.
Once you have several paper cranes, you can use a needle and thread to string them through the cranes’ bodies.
Arrange the cranes along the twine or string, adjusting the spacing to your liking.
For my garland, I started with a premade beaded necklace that I had in my bead stash. This wasn't the best idea because I didn't realize the string they had used was clear elastic, and it began to stretch as I added the weight of my decorations. I made a quick chain of glow-in-the-dark yarn to support it and add some nighttime effect.
I created a variety of decorations to hang from this central garland using buttons, beads, safety pins, fabric flowers, bobbins, empty thread spools, costume jewelry, and other odds and ends I found.
Tips:
Think spring with pastel shades like light pink, lavender, mint green, and yellow. You can also mix in a few brighter colors to make it lively.
Play around with different sizes of pom-poms, flowers, or cranes to create visual interest.
You could customize it with bells or other spring-themed decorations, like butterflies or bees.


Comments